
")
")
")
Tracking Steps of Aerial 360° Mark IV Showcase improvement
Here the goal is to keep track of issues and problem-solving in using 360° source file assembled via Drone DJI Mavic Pro 2 with 28mm Hasselblad L1D-20c lens.
The initial record was part of the shooting session reported in WORKSHOP REPORT WHI 2021-04-27.
File Details
- Compression : JPEG, quality: 96, subsampling ON (2x2)
- Original Scale : 5472 x 3648 Pixels (19.96 MPixels) (3:2)
- Colors : 16,7 Million (24 BitsPerPixel)
- 27-04-21 / 11:03:14
- Altitude absolute : 83m
- GPS Coordinates blocked by building natural faraday cage
- Total Pictures serie : 26 photos
- Output file produced by Drone : 8192 x 4096 Pixels (33.55 MPixels) (2.00)
Camera relevant details:
- ExposureTime - 1/15 seconds
- FNumber - 3.20
- ExposureProgram - Manual control
- ISOSpeedRatings - 100
- FocalLength - 10.26 mm
- ColorSpace - sRGB
- ExposureMode - Manual
- White Balance - Manual
- DigitalZoomRatio - 1 x
- FocalLengthIn35mmFilm - 28 mm
DRONE SOURCES Gallery
[widgetkit id="6" name="Mark IV Aerial Showroom Sourcefiles 100_0353"]
Early Analysis:
As expected, the main problem here is that even with camera calobration the colors are disgustingly citrus and yellow. Main color issues are listed below :
- Ceiling lighting is not daylight calibrated and mixed, general lighting power received by the asset is dramatically low
- Glass surrounding galleries for costumes exhibition are covered with creamy fabric lighted with warm leds panels, resulting in a citrus yellow bouncing around
- A big red plane is suspended right on top of the scene, bouncing a mixed reflected redish/pink/magenta around the white ceiling and surrounding monochrome prints, acting as a reflector too.
On the opposite side of the tank, the daylight marquise at far clearly shows the white balance of the camera is correct, but the local surrounding light on the asset is quite a challenge.
The result is even more obvious on the following result panoramic navigable export :
Corrective actions available
The Best Quality
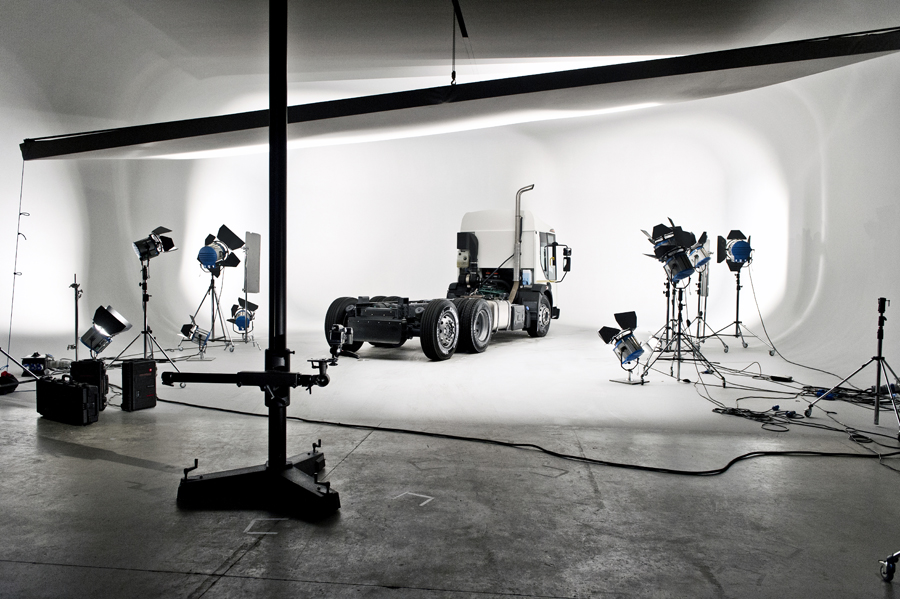
The ideal configuration would be total isolation of the asset and perfect lighting control as in cinema sets :
- 10K-20K+ Tungsten daylight 4000° corrected soft surround lighting or Kinoflo equivalent
- total black masking of surrounding and roofing glass windows
- elimination of ceiling and distant color pollution (turning off all museum current lighting and working at night)
This may result in 5 to 10K€ investment with the crew and security assistance and an additional 2 days of preparation to be performed. See for reference the Behind The Scenes of the Fury Film Set or Truck Photography setups by Dennis Eagle.
The best cost-effective
A much cheaper and quick solution is to take apart (clipping) tank features and surroundings in photoshop or equivalent professional editing software, and realign locally color based on physical measurements made on-site.
A medior or senior graphic designer may perform the procedure in 2 days with a general loss of color accuracy estimated to 15-20%, which is acceptable at this point of the benchmark. In normal conditions, such a task is considered, in 2021, an average cost of:
- 300€ with internal staff western europe usual permanent contract
- 600-1000€ for a graphic designer medior freelance from western europe
- 100€ with offshore "mass-clipping" subcontractors + color bending still to be done by a local expert with access to accurate measurements.
I recommend a trained staff or assessed local contractor as a better durable solution, and easing the process of retrieving the source editables for Marketing and museograph purposes, which, in this case, may weight huge volumes such as 2-3 Gb output.
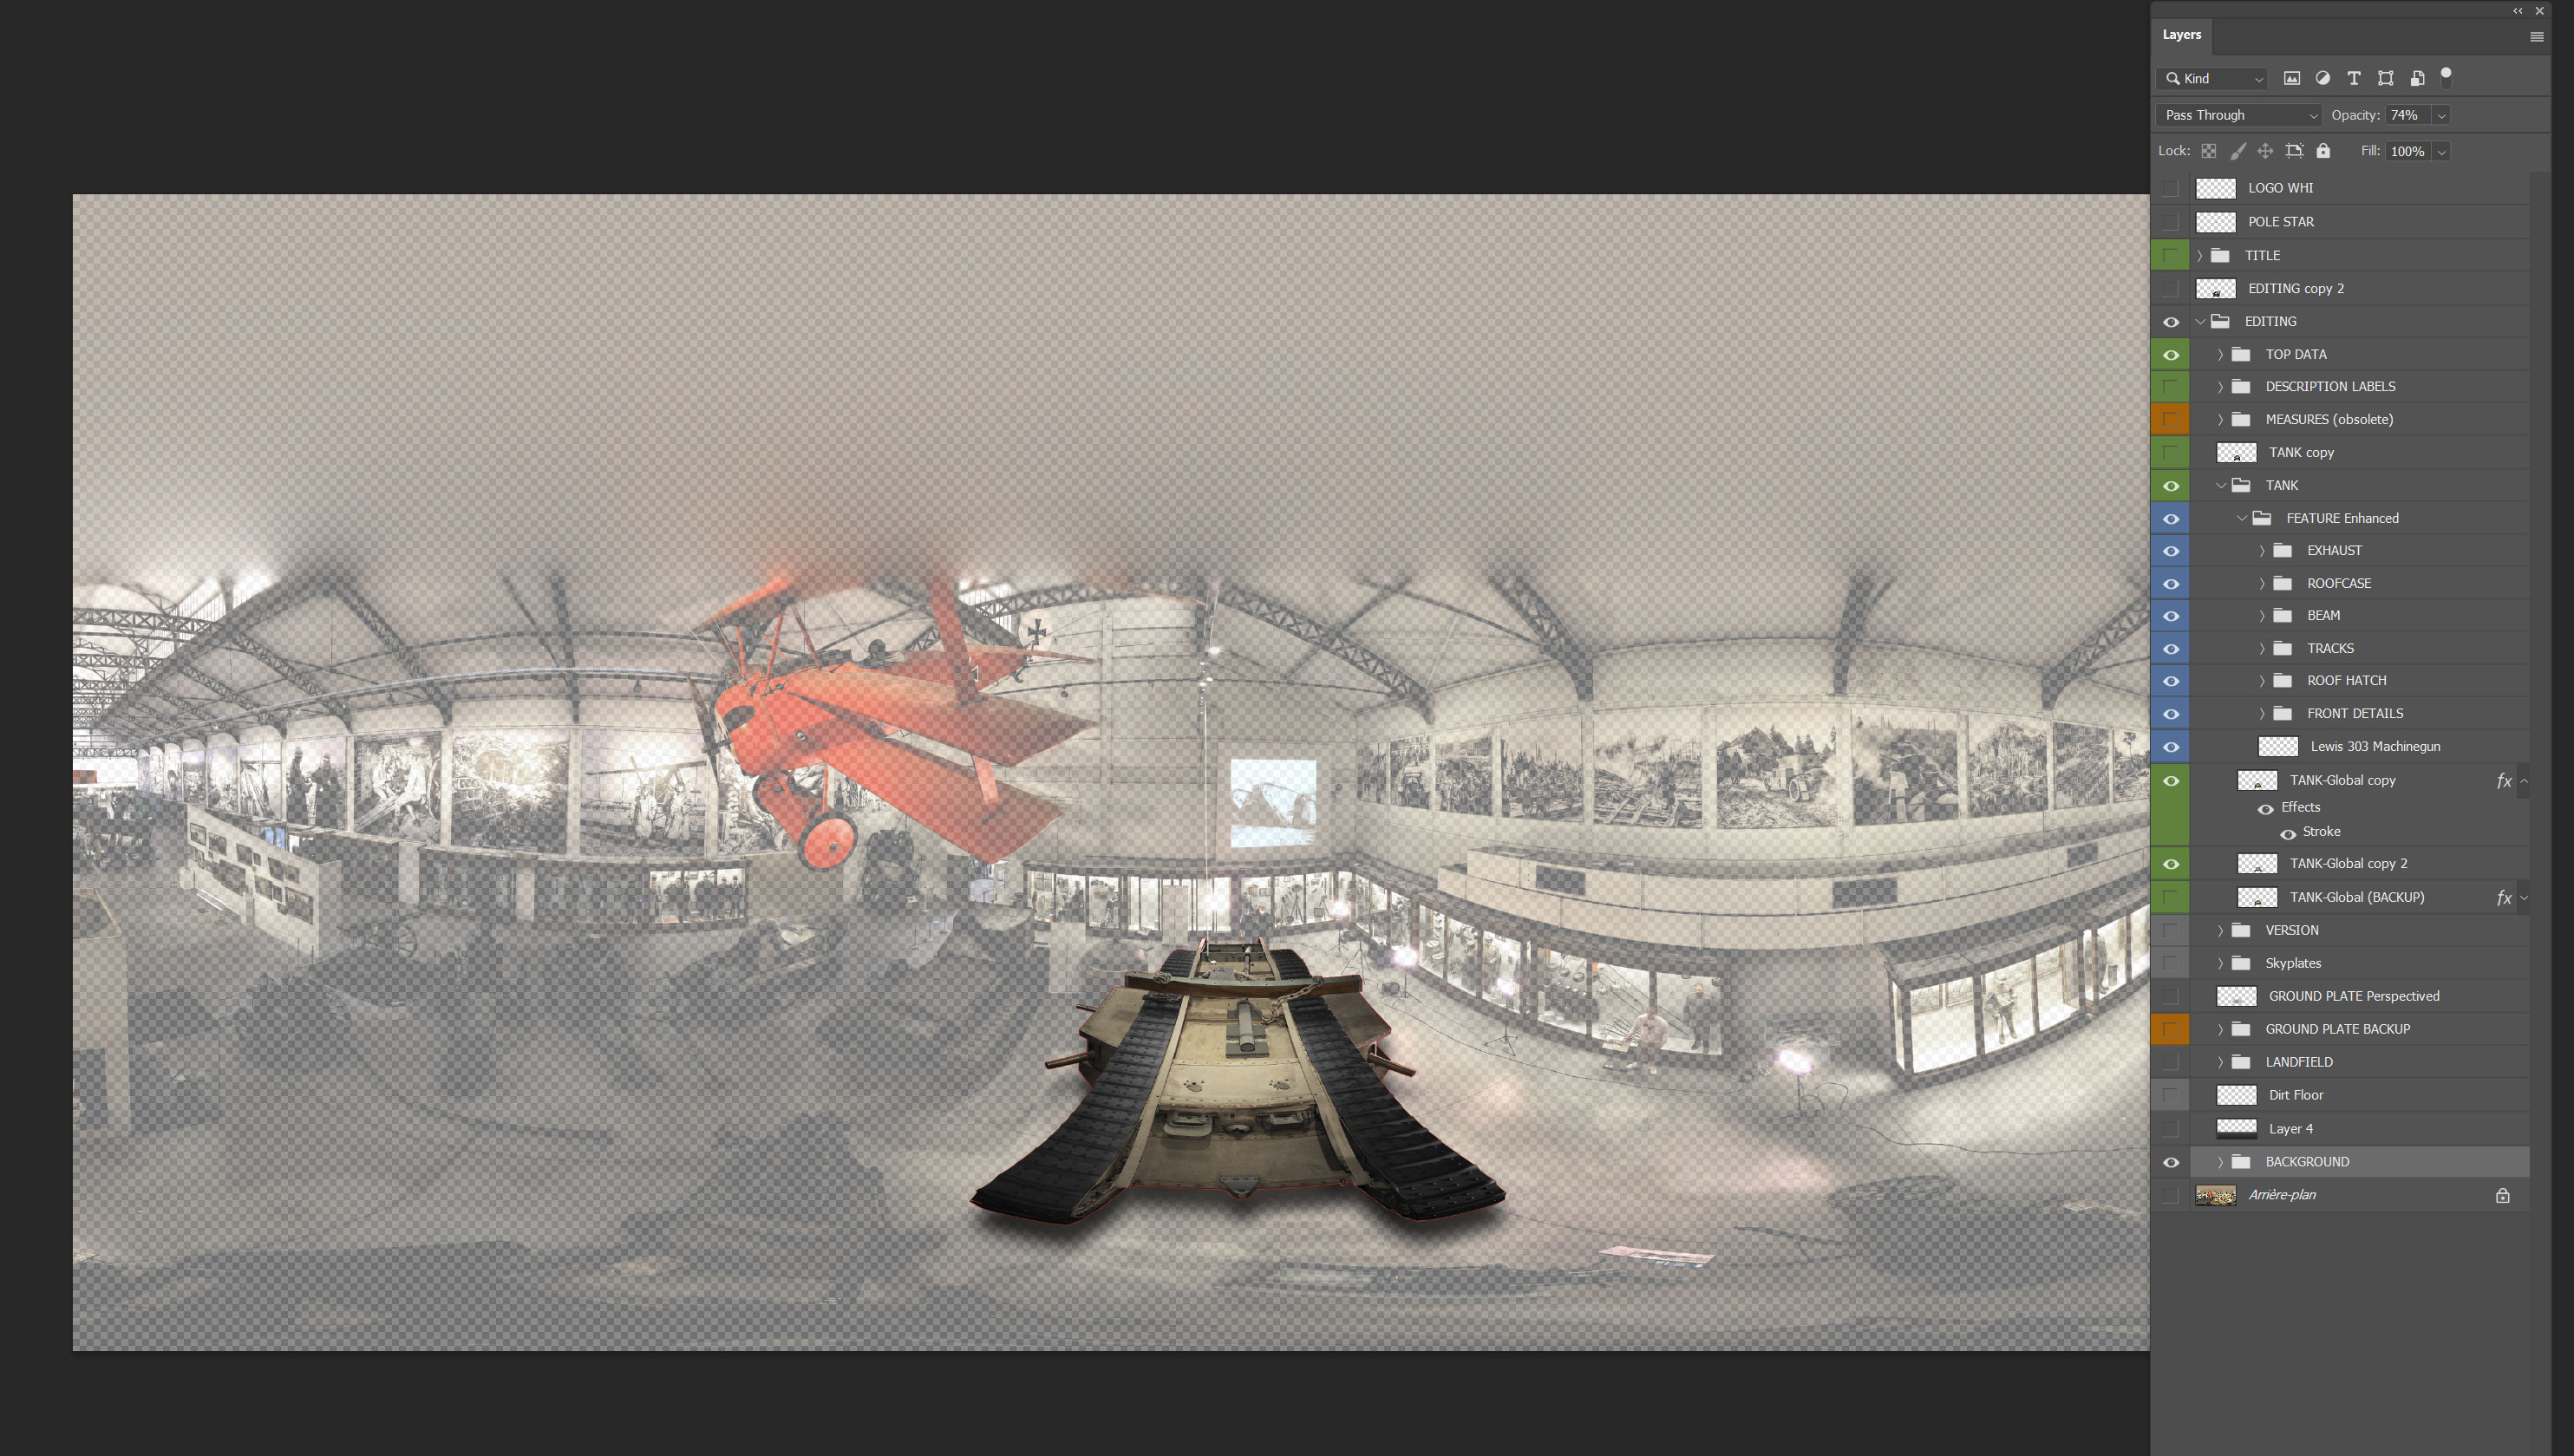
Improvement step by step
- First action in Photoshop is to uncompress jpeg file, upscale it to 16000x8000 pixels
- Then backup in Large Photoshop format (.psb)
- Start color improvement processing
Here is comparative Illustration before-After (Source - First correction draft) : the yellows have been lowered and lightcurves equilibrated to reveal shadows information. Inadequate bouncing magentas have been drastically decreased since the asset itself do not contain any magenta at all. This result in low tones on the plane but this could be improved later if relevant.
Another Fine tuning helps revealing natural contrasts of the asset and even allows "un-natural local recoloring" to improve readability, and maybe prepare the file to be used in museography or marketing.
See also : Prototyping the 360° Mark IV LODESTAR III navigation experience based on actual document source.
To see the result in Full Screen, click here.
- Created on .
- Last updated on .
- Hits: 169